

What the HubSpot integration syncs
Tirdad does not sync payments, plans, or prices with HubSpot, and it does not read invoices back from HubSpot.
Before you connect HubSpot
- HubSpot super admin access. HubSpot only lets super admins create private apps.
- The Tirdad environment for the connection. The webhook URL that HubSpot calls contains the tenant and environment IDs of that environment, so create the connection in the environment you want customers to land in.
- A HubSpot quote template, if you plan to use quote sync. HubSpot only publishes quotes that have a template, and Tirdad attaches the first template in your account.
Step 1: Create a HubSpot legacy private app
1
Open legacy apps in HubSpot
In your HubSpot account, go to Development, then click Legacy apps in the left sidebar.The page encourages you to build new apps on HubSpot’s newer developer platform instead. Create a legacy app anyway: the Tirdad connection uses a legacy private app’s access token and client secret.
2
Create a private app
Click Create legacy app, then select Private. On the Basic info tab, enter a name such as
Tirdad.3
Add the scopes
On the Scopes tab, click Add new scope and select the scopes for the syncs you plan to use, listed in the table below. Click Update.
4
Create the app
Click Create app, review the notice about the access token, then click Continue creating.
HubSpot scopes for each Tirdad sync
The Required Scopes panel in the Tirdad connection drawer lists the scopes for the syncs you turn on. It lists
crm.objects.deals.read only when deal sync is on, but customer sync also needs it to read each deal and its contacts. HubSpot prompts you to add it when you subscribe to deal events in Step 4.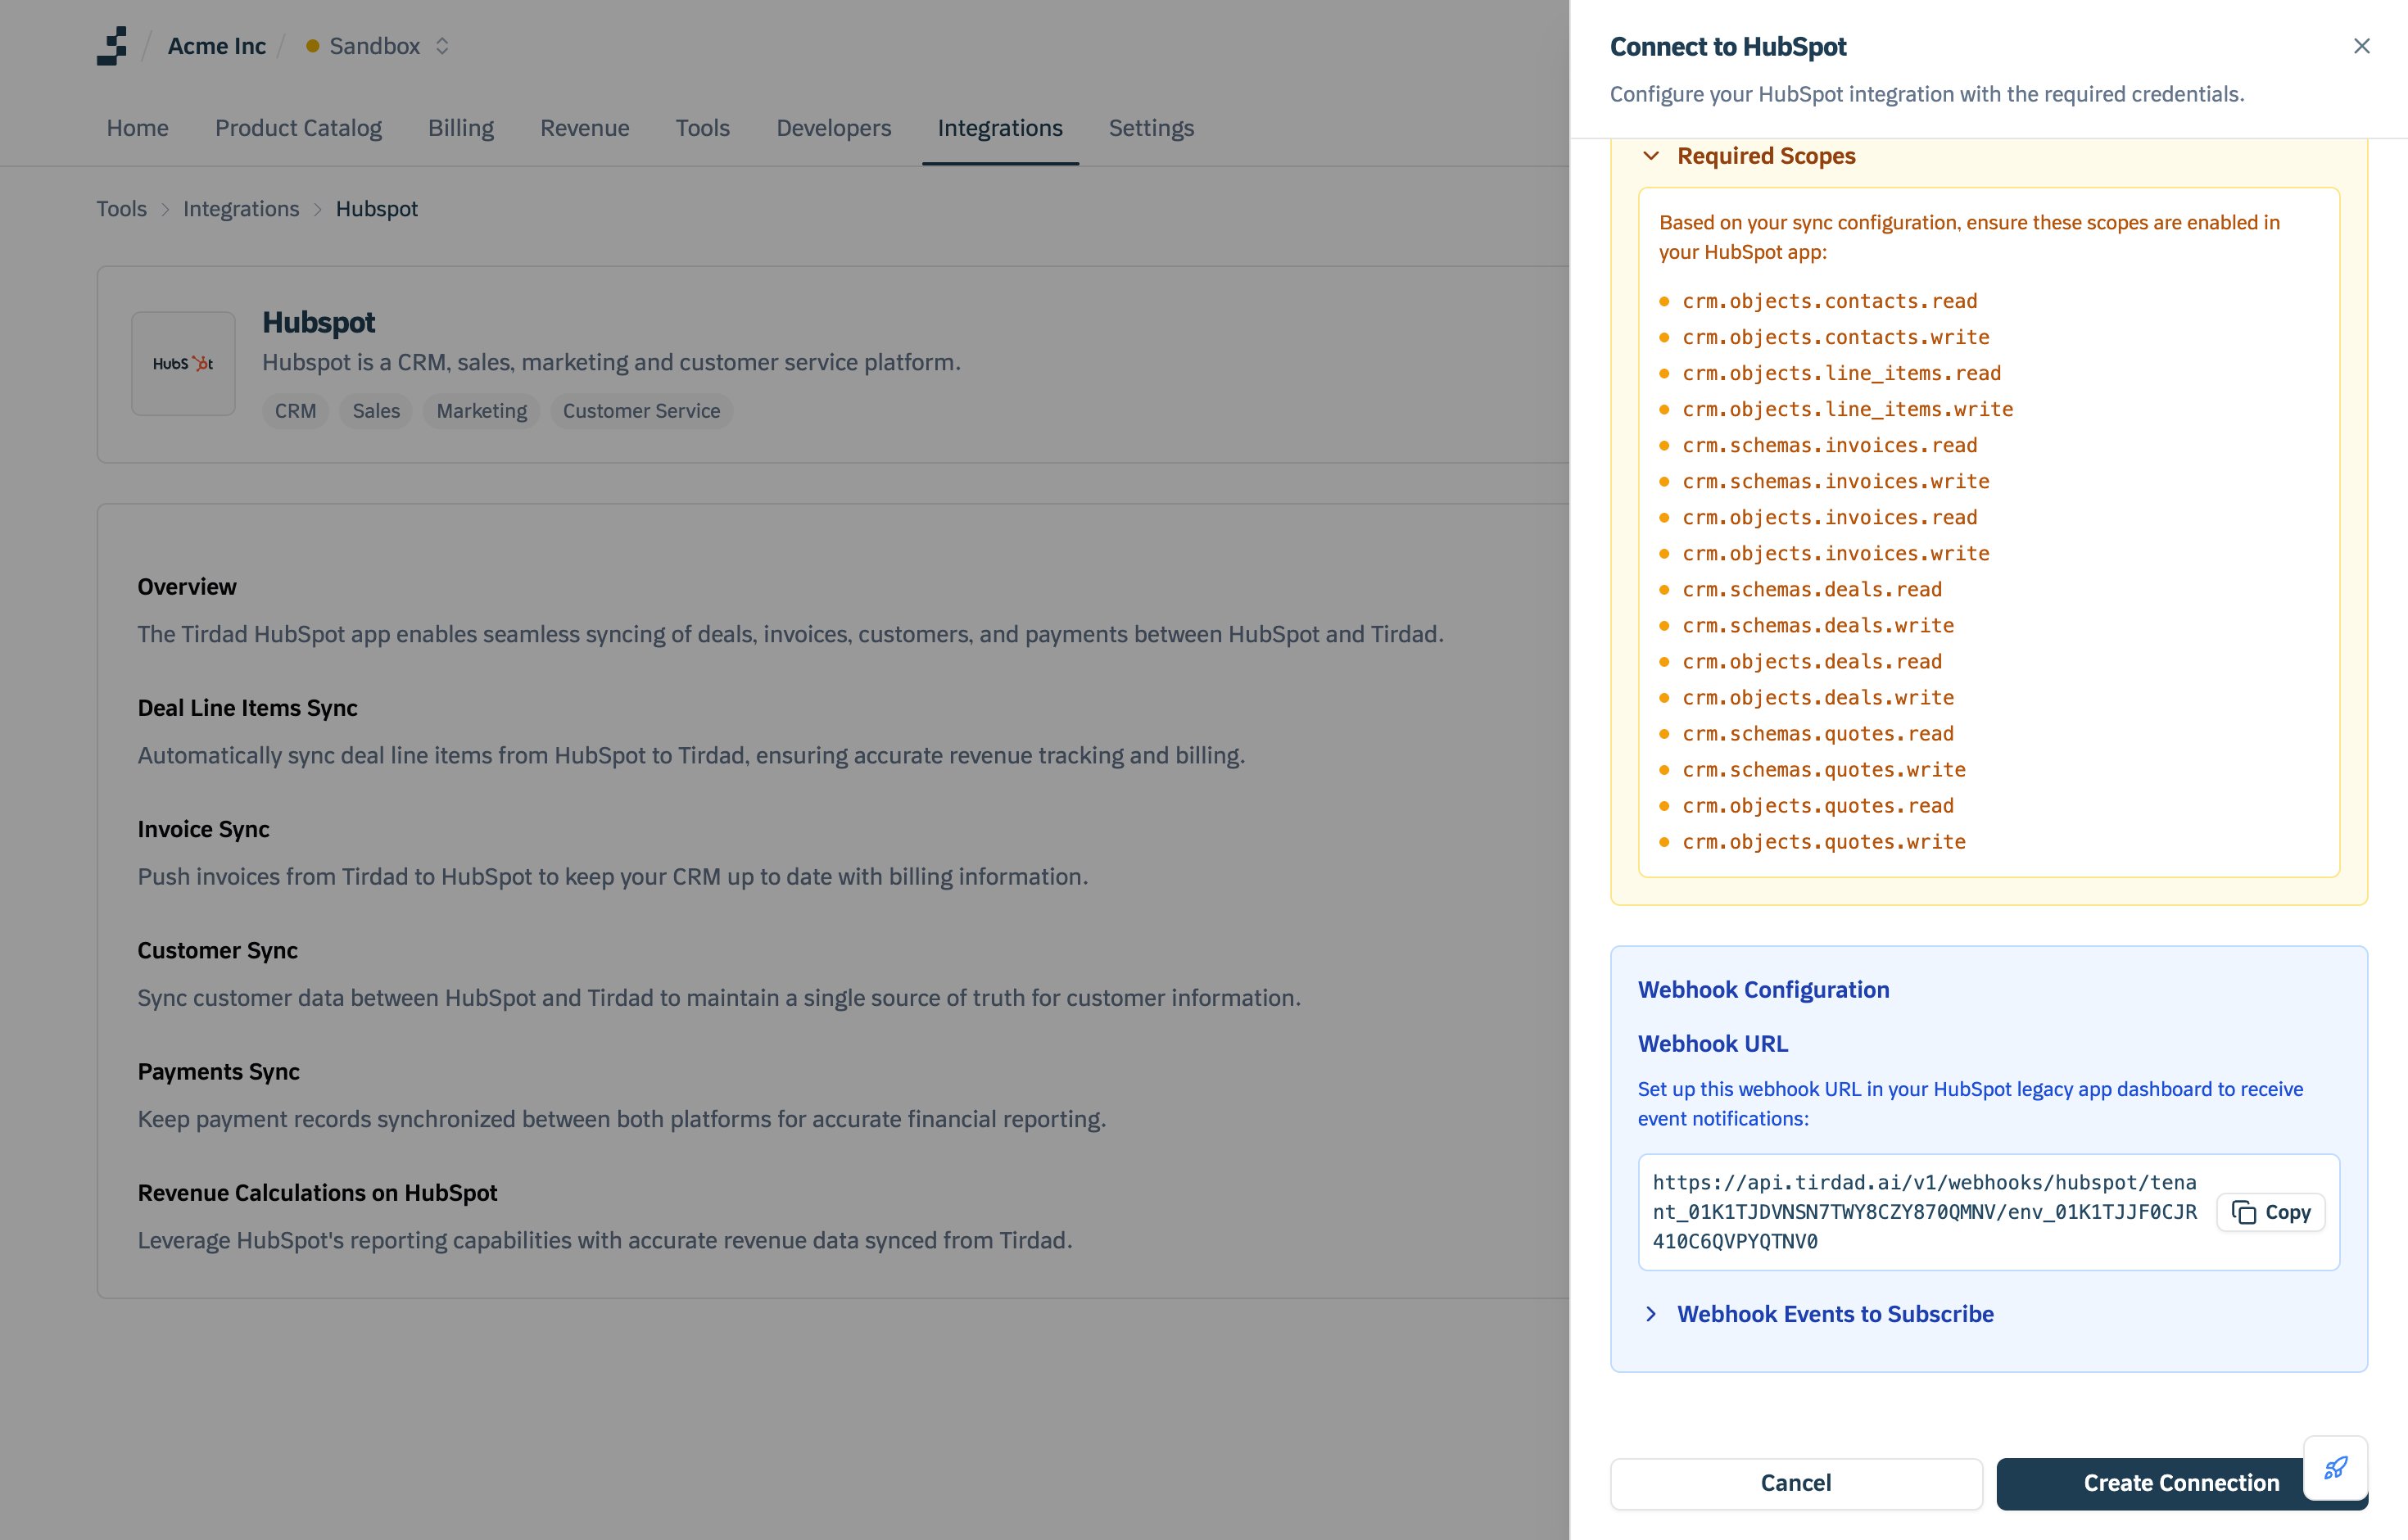
Step 2: Copy the HubSpot access token and client secret
Open your app from Development → Legacy apps, then click the Auth tab.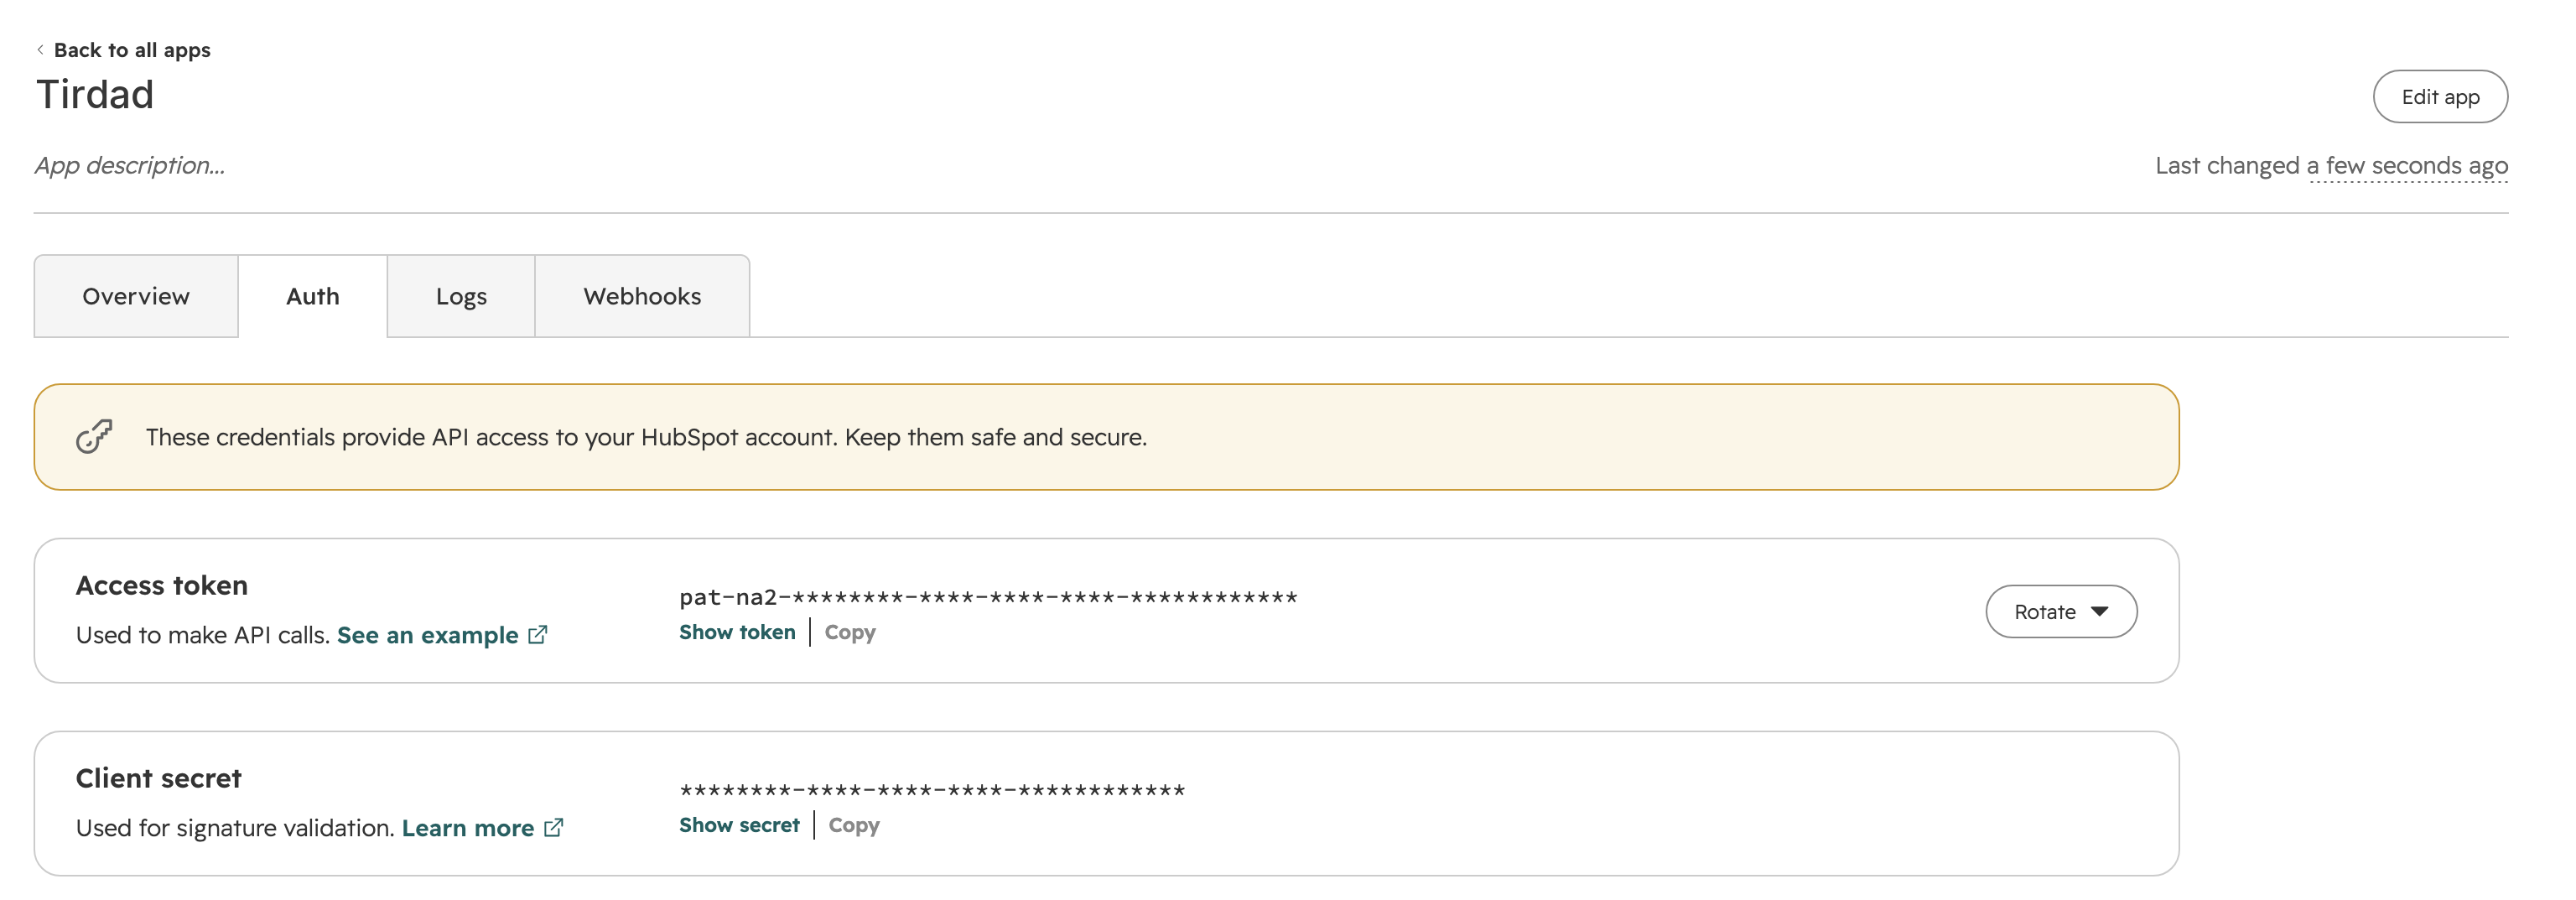
Step 3: Create the HubSpot connection in Tirdad
Connecting HubSpot from the Tirdad dashboard
1
Open the HubSpot integration
In the Tirdad dashboard, open Integrations, select HubSpot, and click Add a connection.
2
Enter the credentials
Fill in Connection Name, then paste the Access Token and Client Secret from Step 2.
3
Choose what Tirdad pushes to HubSpot
Under Sync Configuration, turn on Invoices, Deals, and Quotes for the syncs you want. All three are off by default.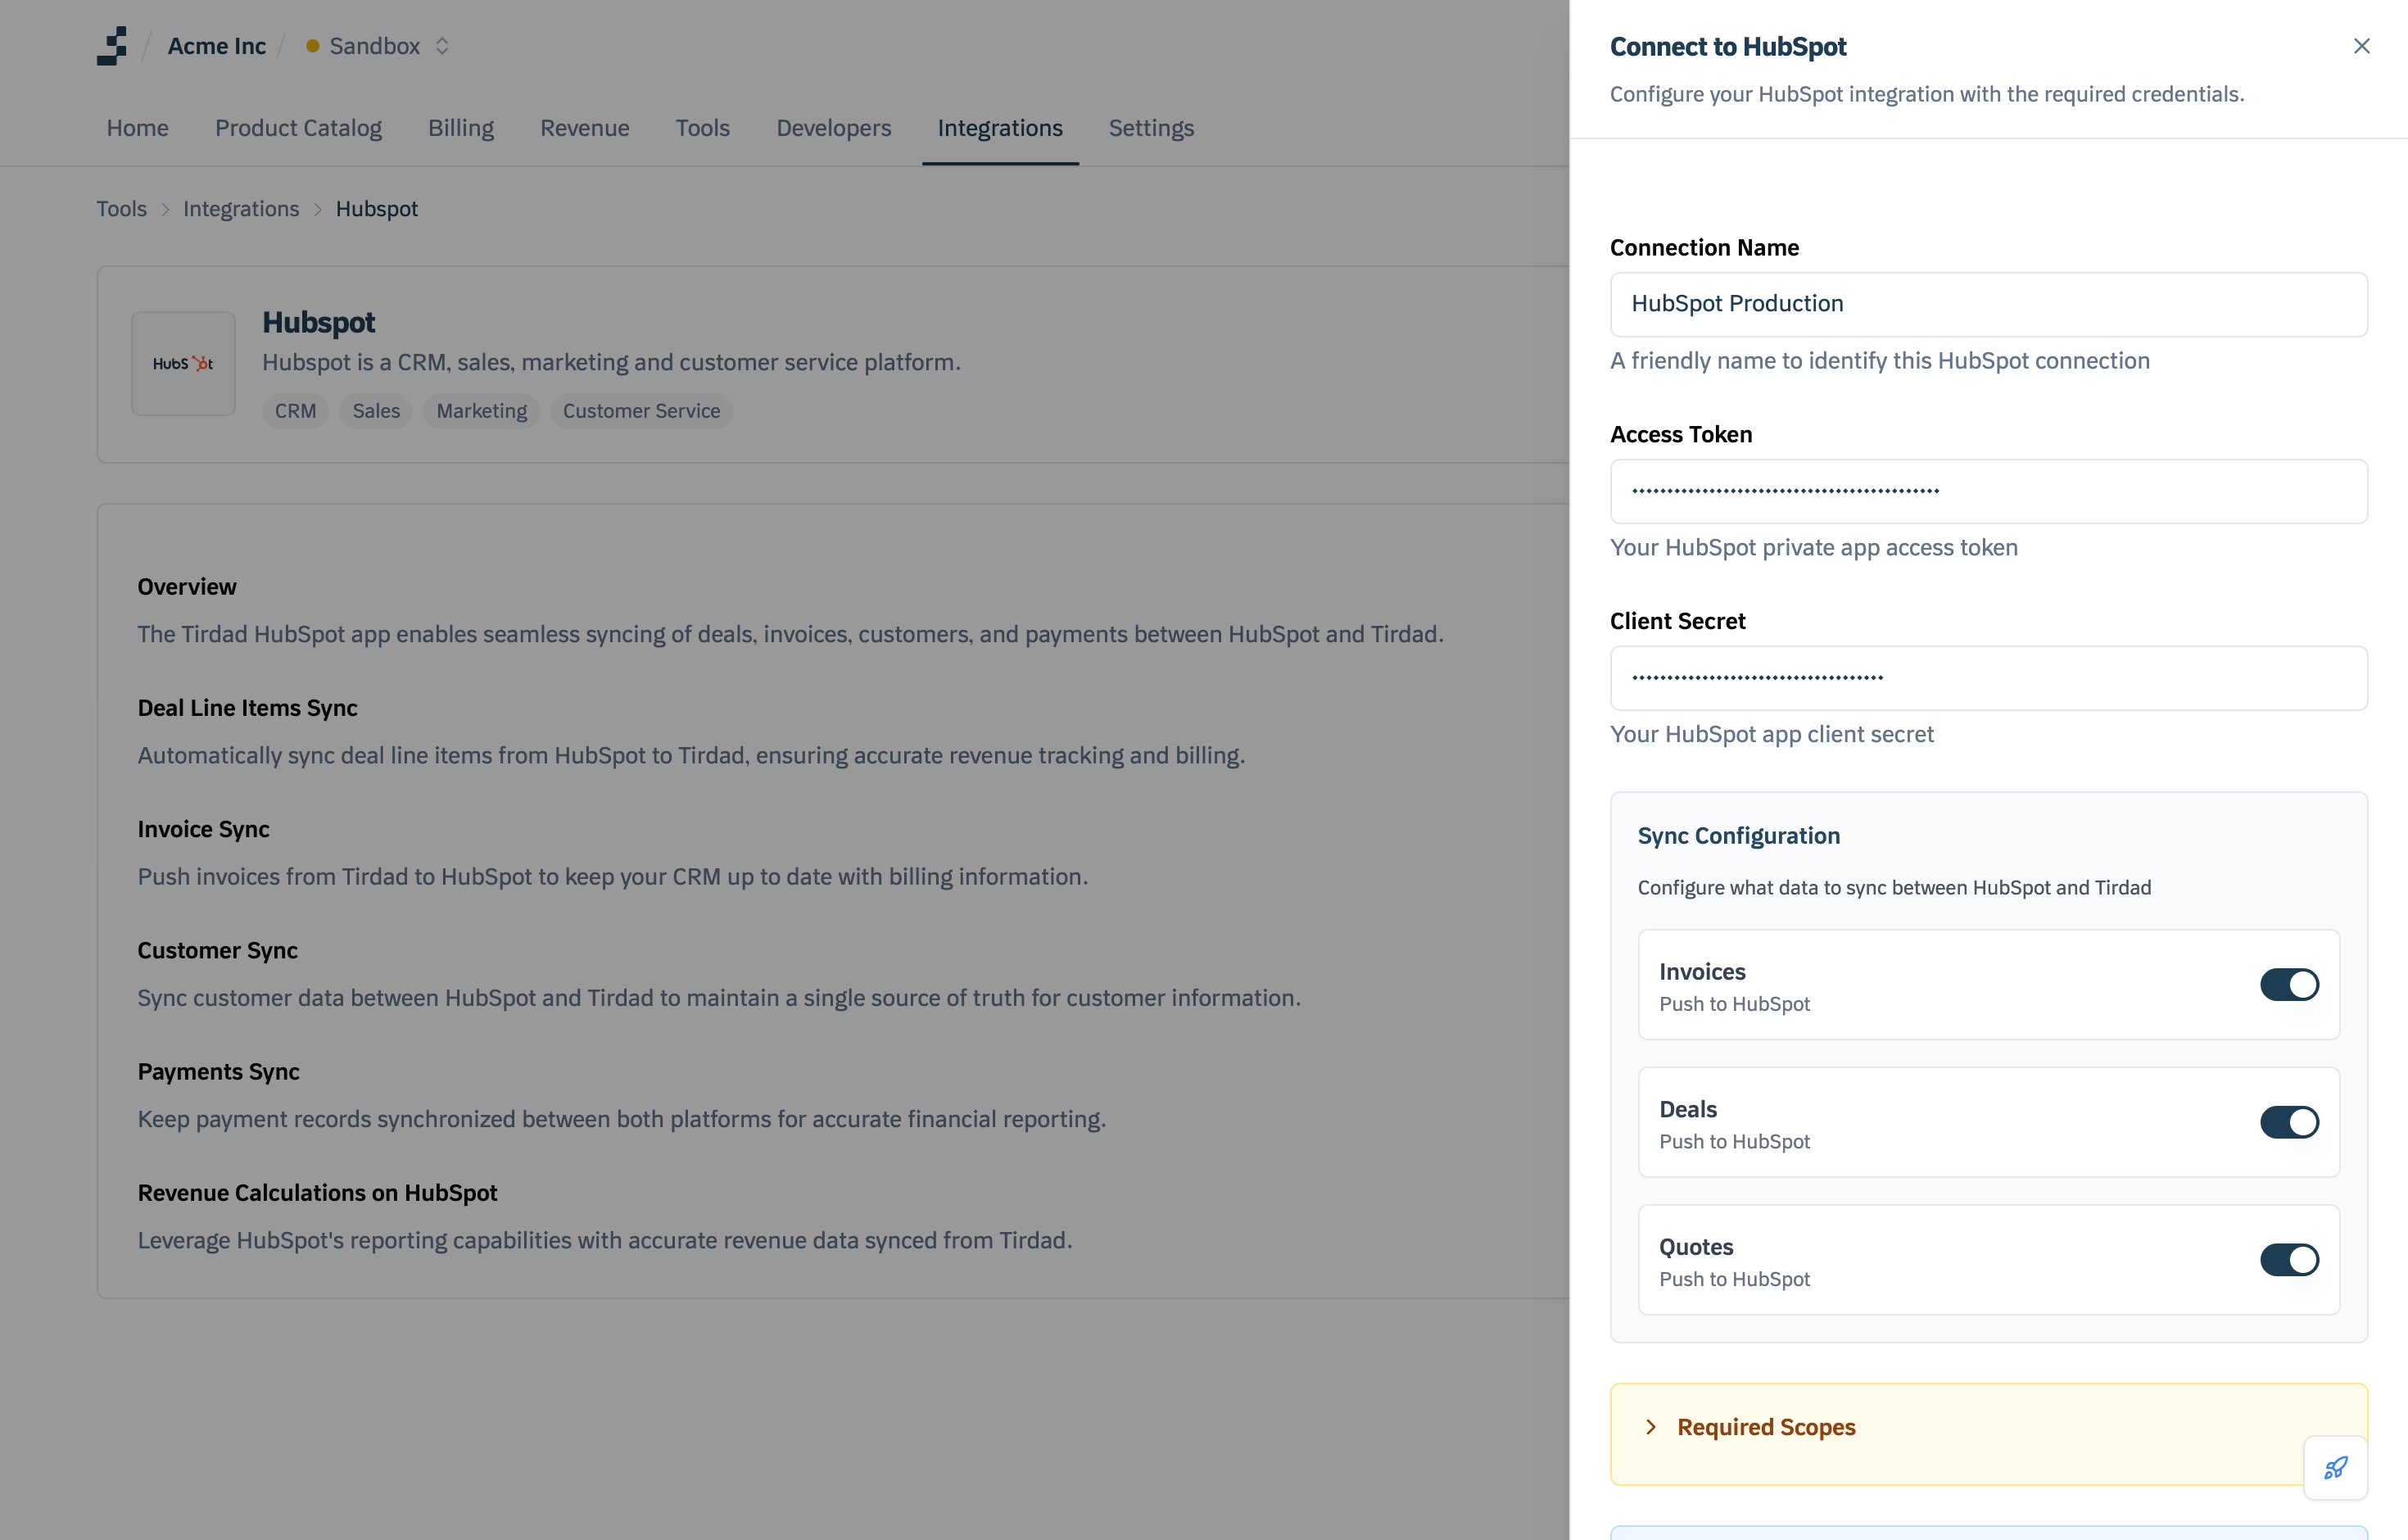
4
Copy the webhook URL
Under Webhook Configuration, click Copy next to the webhook URL. You paste it into HubSpot in Step 4. Expand Webhook Events to Subscribe to see the deal event HubSpot needs to send.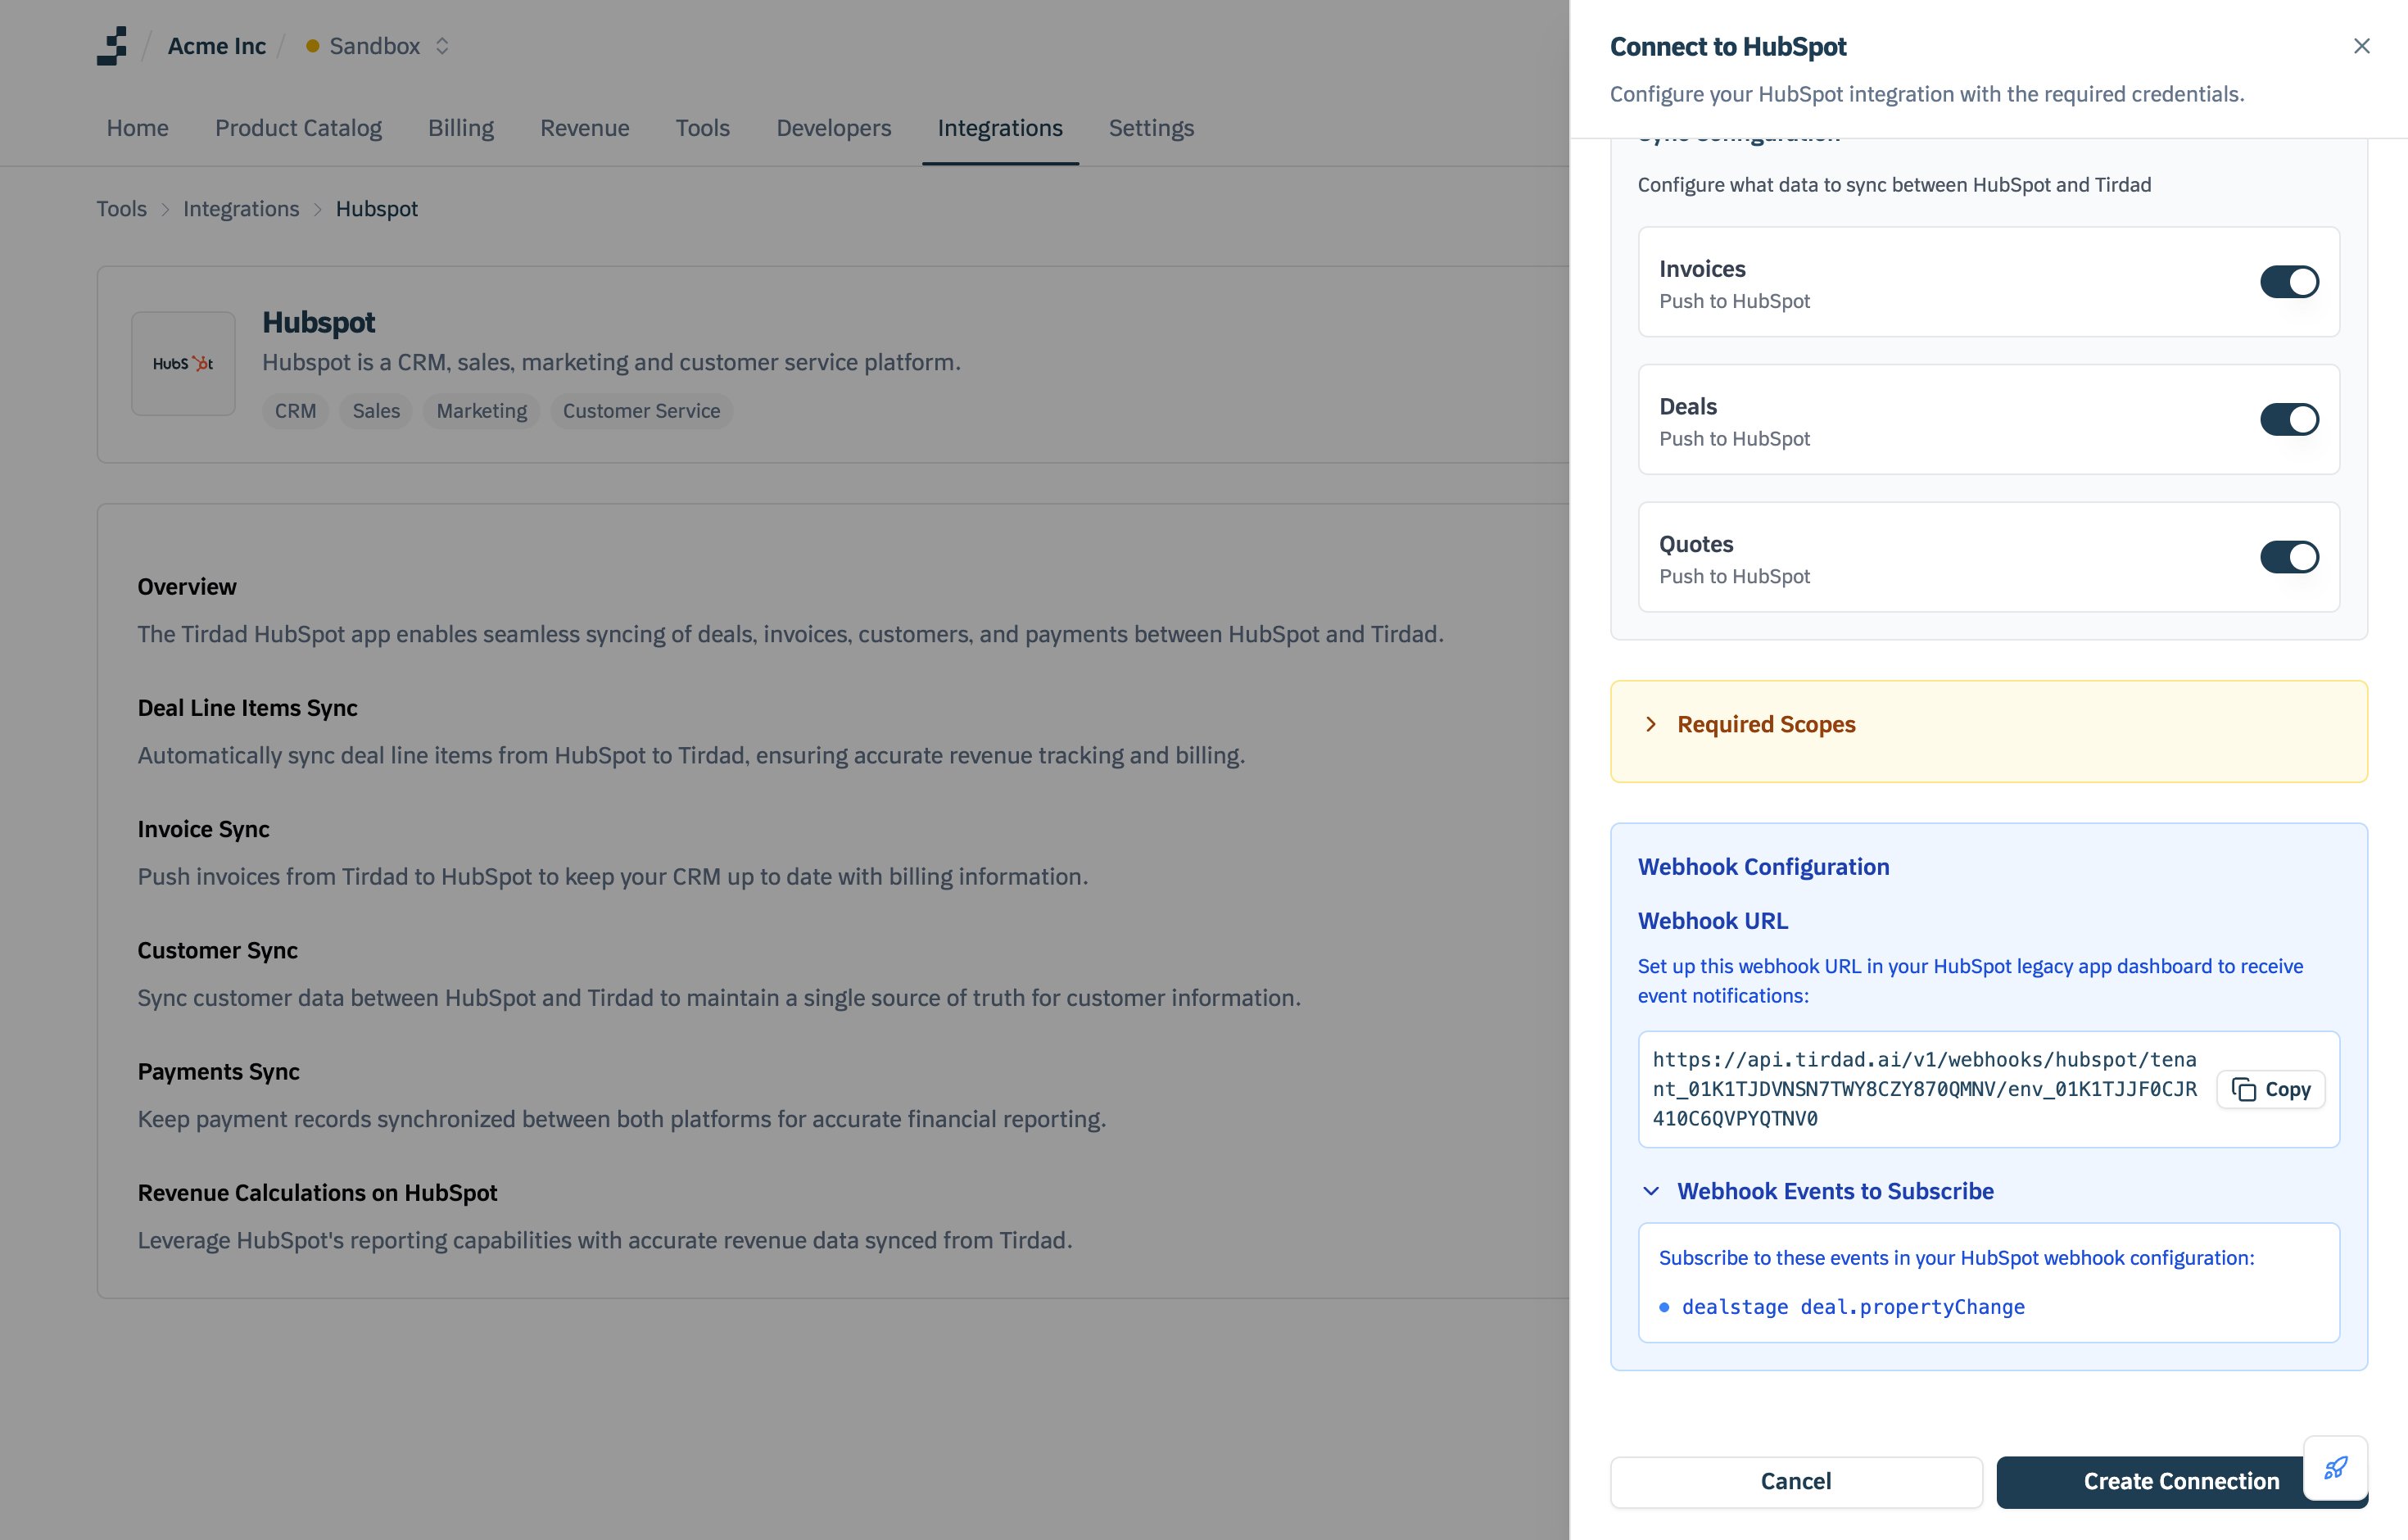
5
Save the connection
Click Create Connection. The connection appears under Connected Accounts on the HubSpot integration page.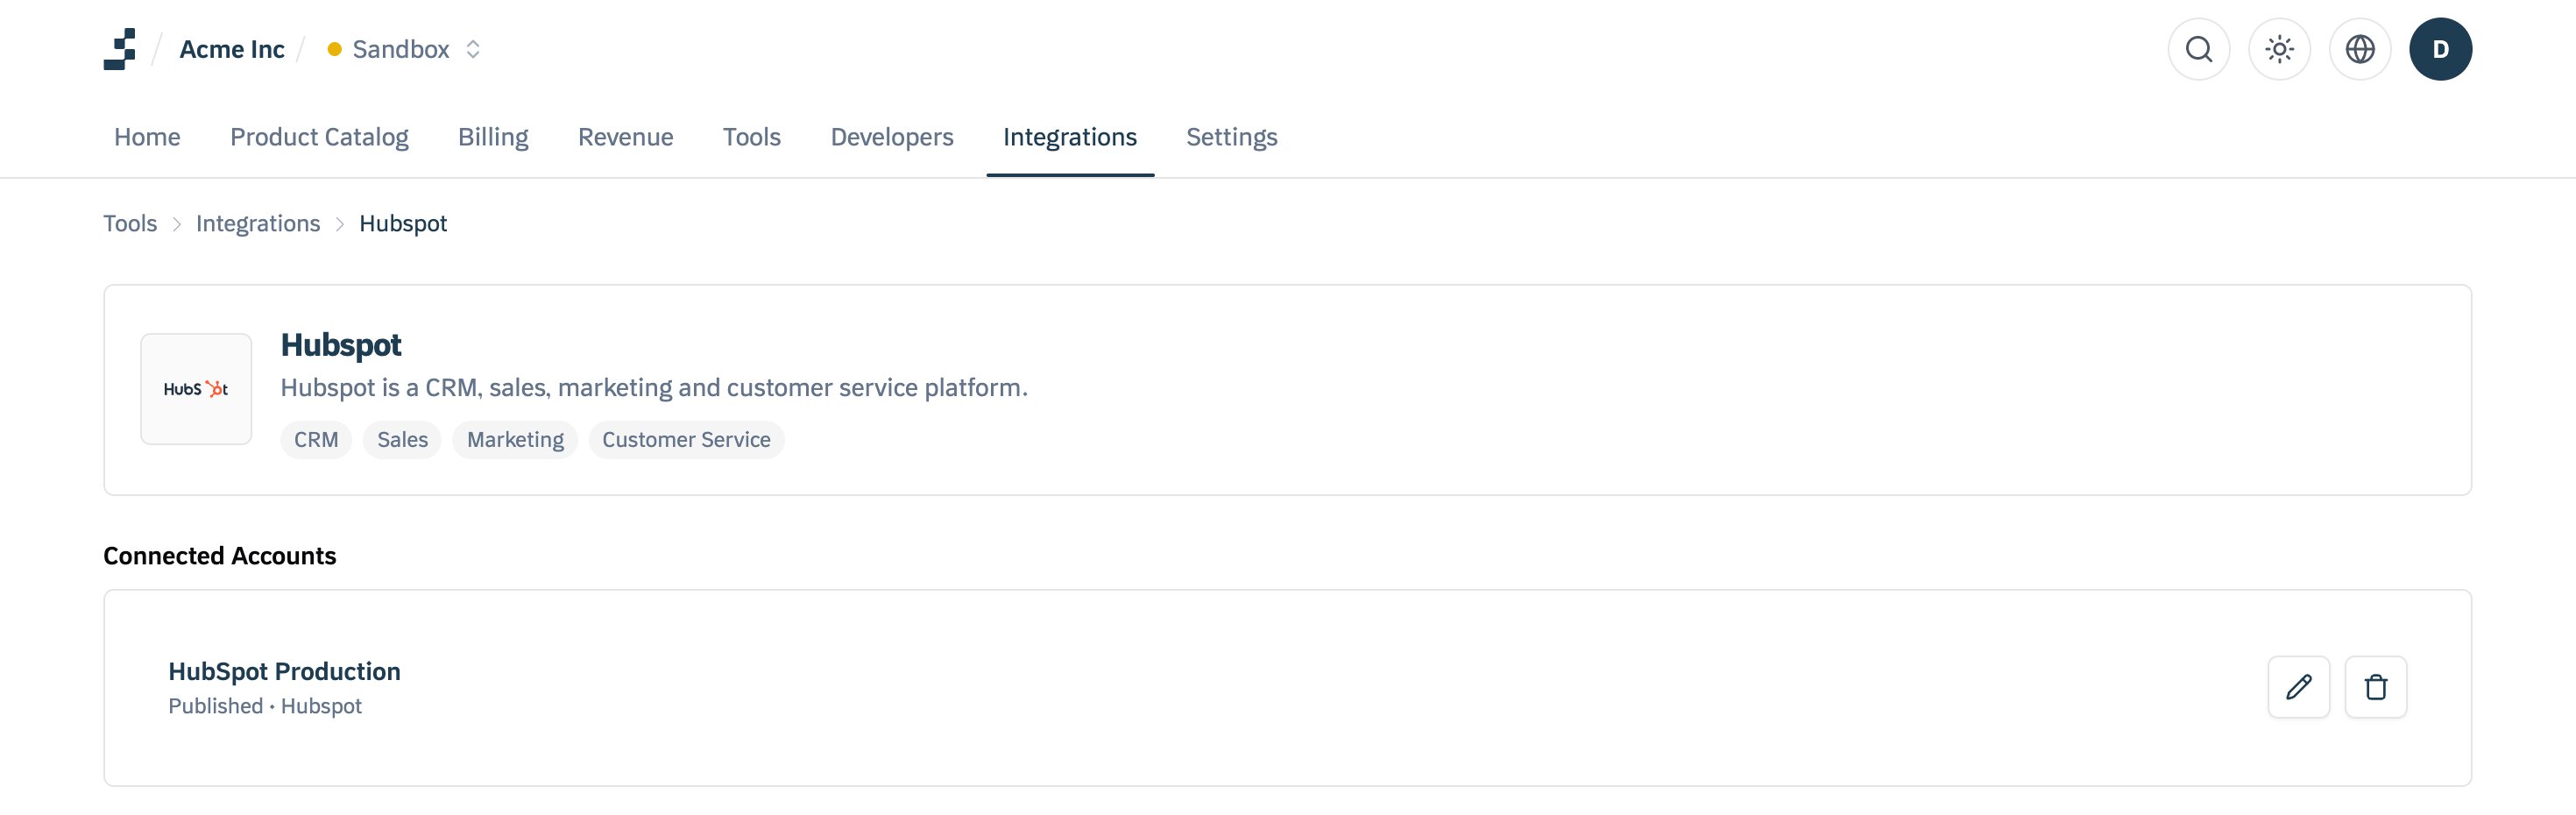
Creating the HubSpot connection with the API
If you leave out
sync_config, every sync is off. Deals and quotes only sync outbound, so Tirdad rejects inbound: true for either of them.
Step 4: Subscribe HubSpot to deal events
Customer sync starts when HubSpot sends a deal event to Tirdad. Set this up in the same private app:1
Open the webhook settings
In HubSpot, open your app, click Edit app in the top right, then open the Webhooks tab.
2
Set the target URL
Under Target URL, paste the webhook URL you copied in Step 3. It has this format:Copy it from the connection drawer rather than typing it. HubSpot already shows
https:// in front of the field, so paste the rest of the URL after it.3
Subscribe to deal stage changes
Click Create subscription. In the panel, choose Deal under Which object types?, Property changed under Listen for which events?, and dealstage under Which properties?. Click Subscribe.Leave Use expanded object support? off. It switches HubSpot to generic event types, and Tirdad only reads 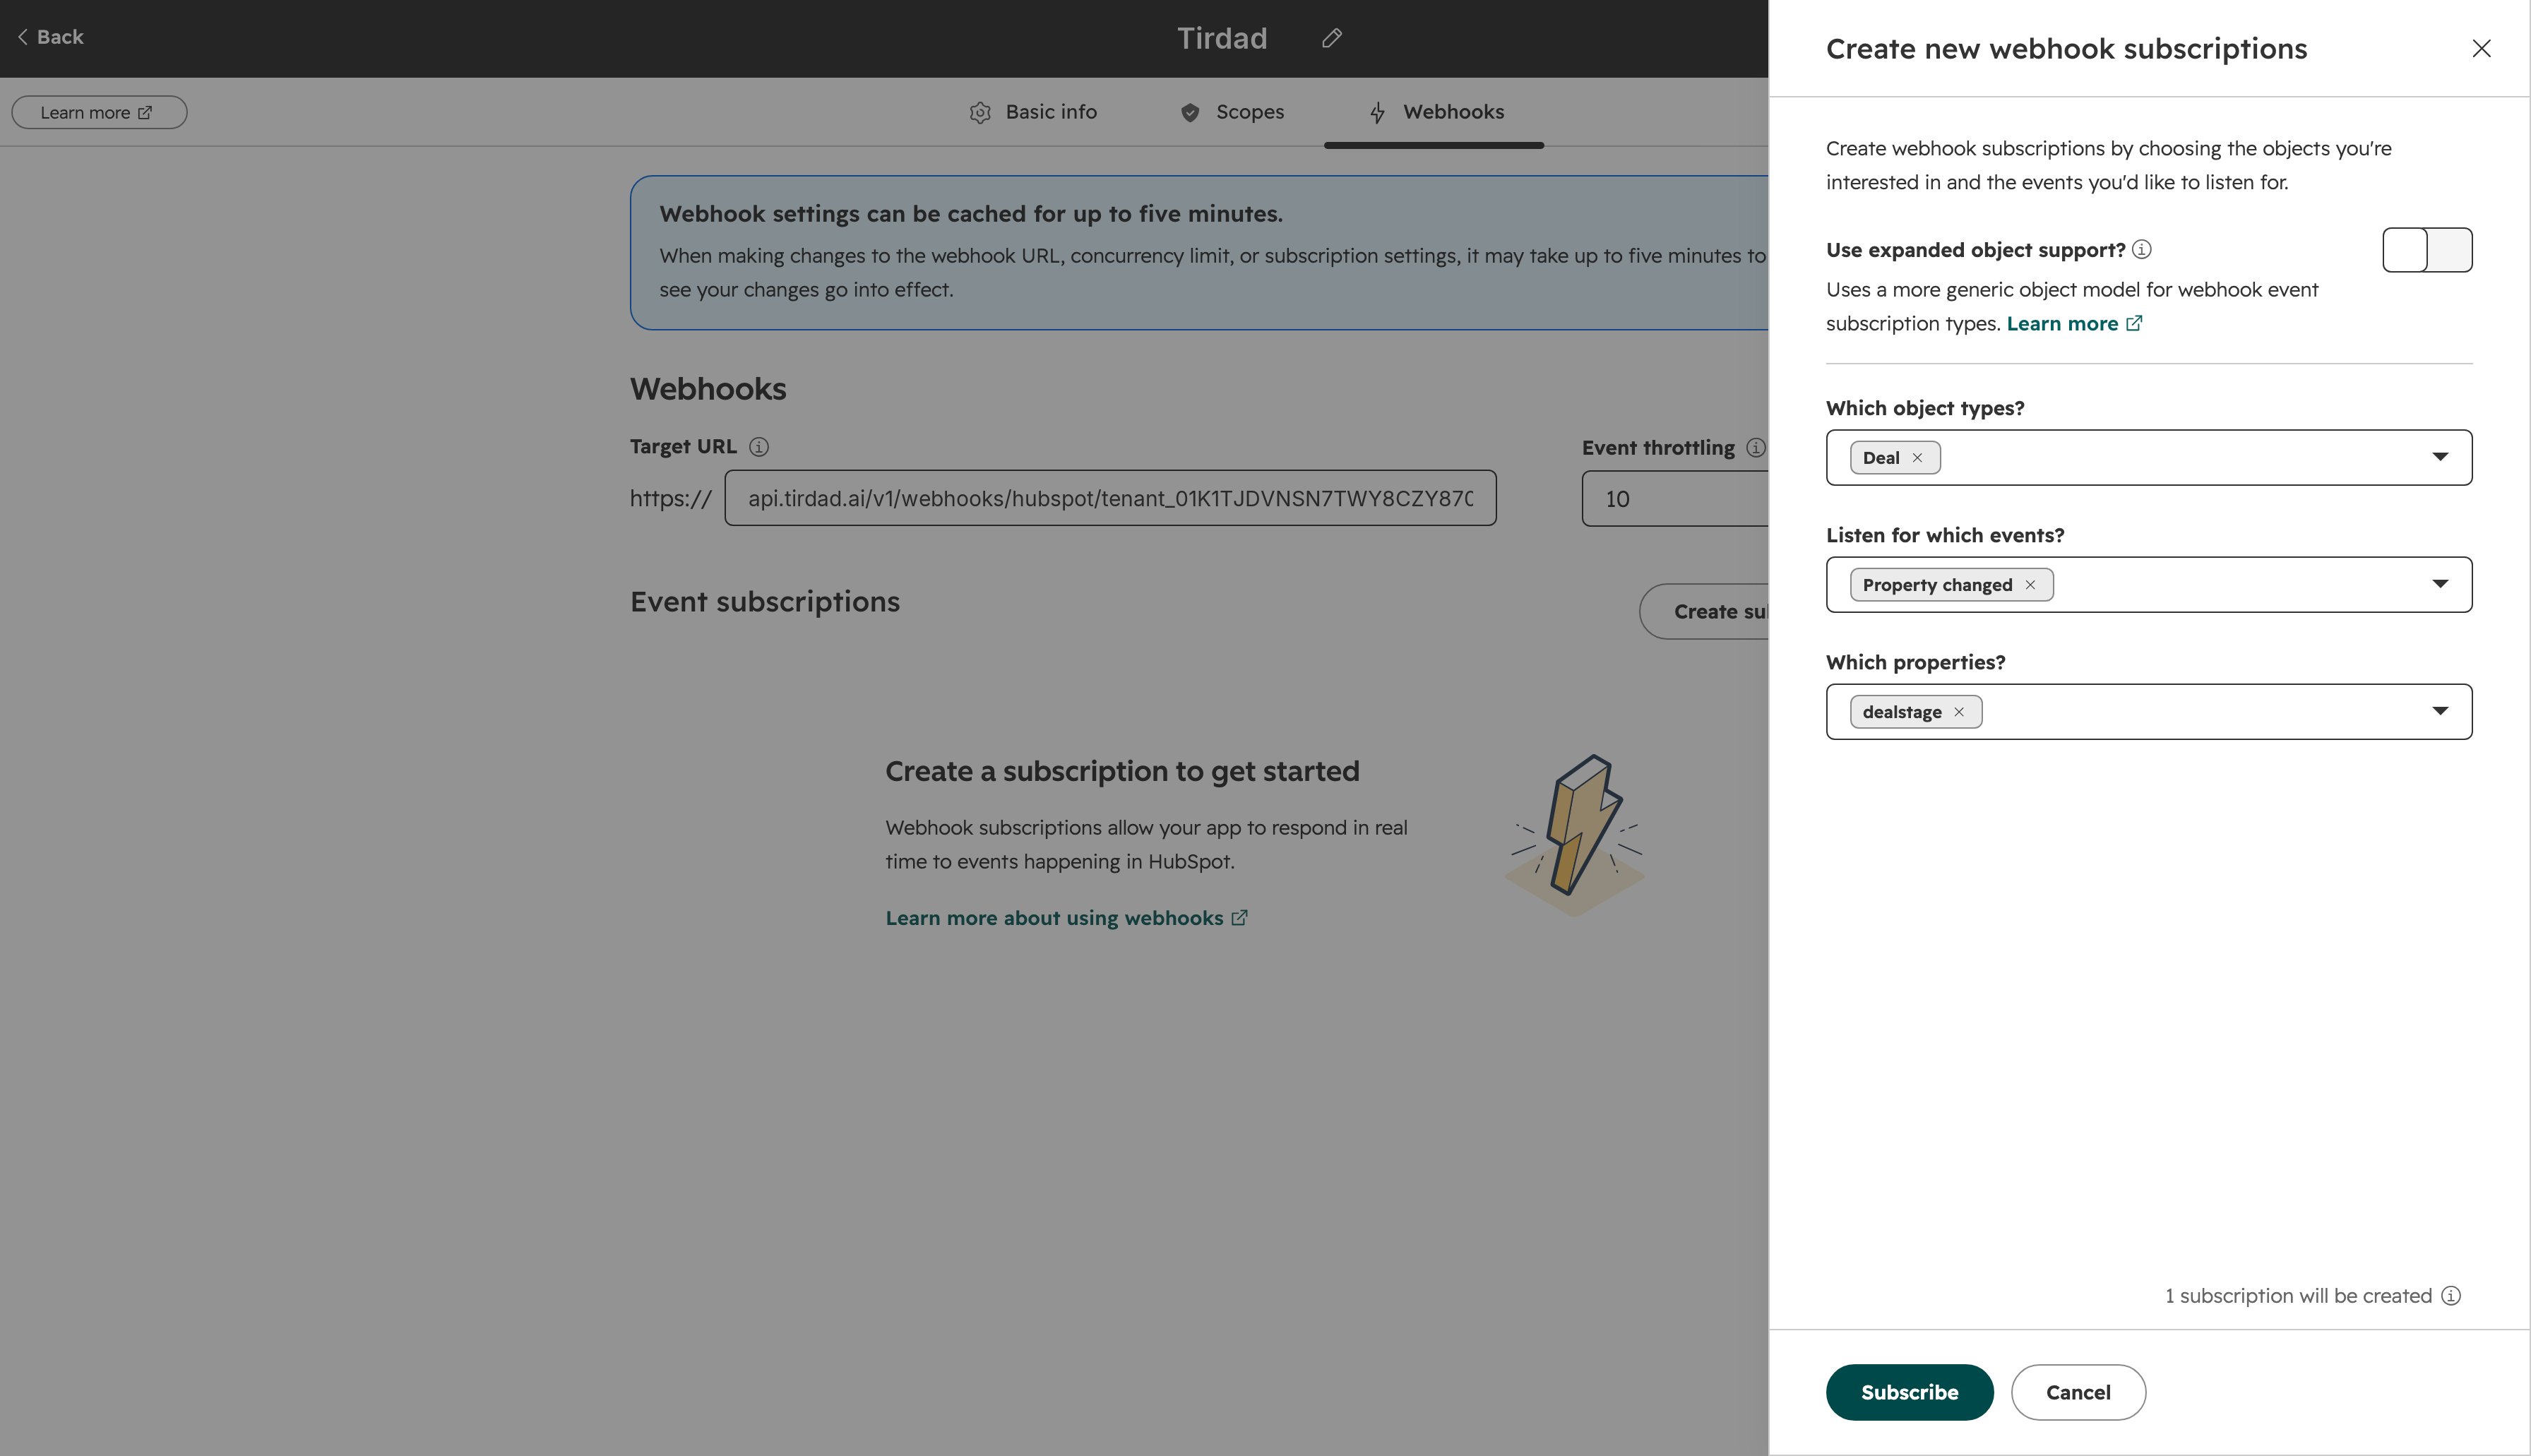
deal.propertyChange and deal.creation.4
Commit the changes
The subscription appears under Event subscriptions as dealstage changed, with the subscription type 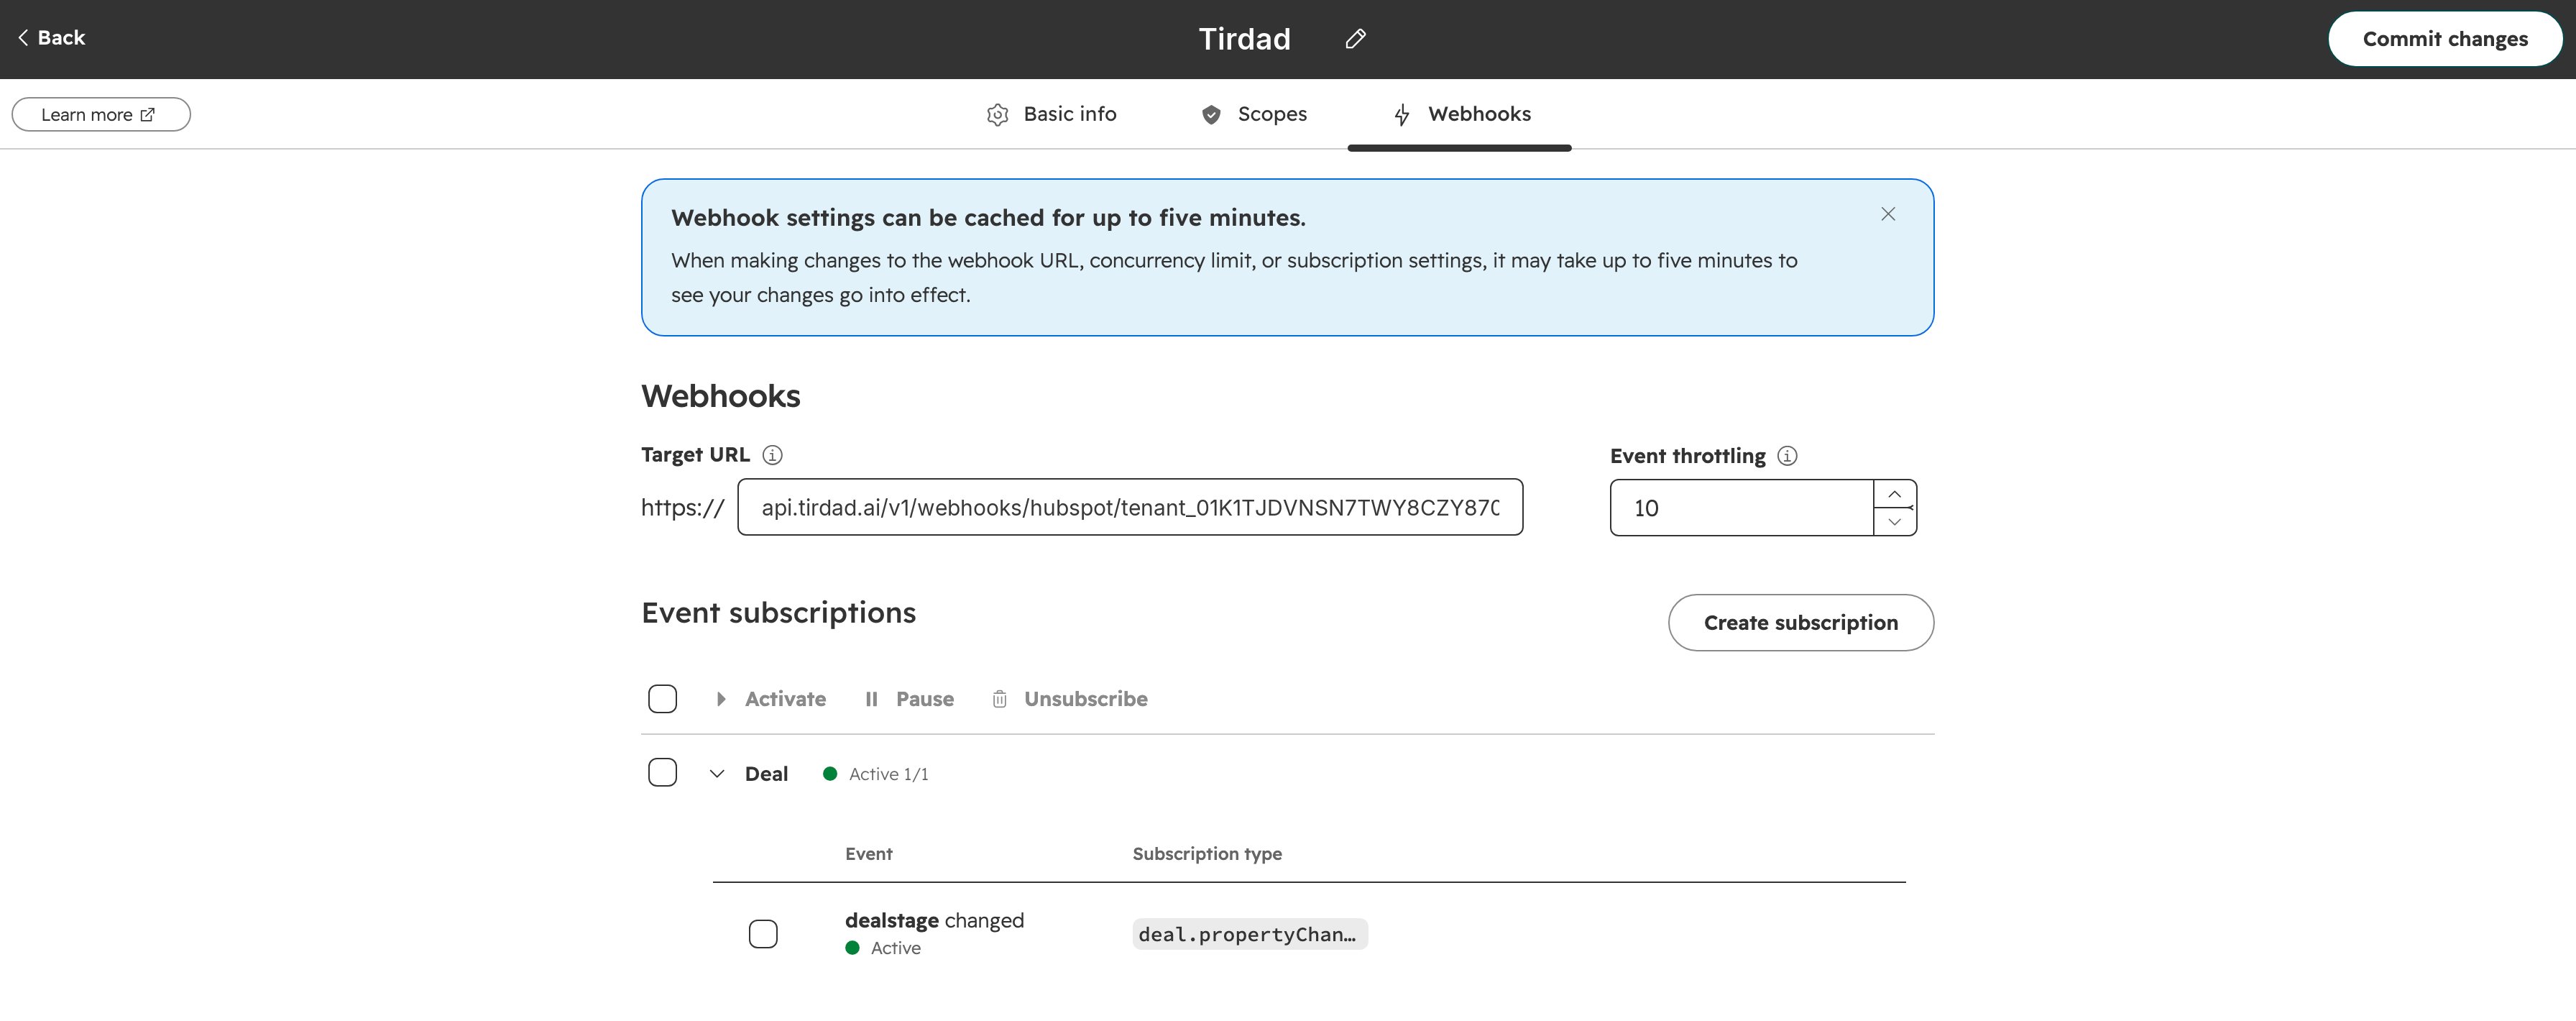
deal.propertyChange. Click Commit changes in the top right.HubSpot deal events Tirdad handles
The connection drawer asks for the deal stage subscription only. Add the Created subscription if you want customers in Tirdad for every new deal, not only for won deals.
Tirdad answers every request from HubSpot with
200 OK, including requests it ignores or rejects, so HubSpot never retries them. A passing Test in HubSpot’s webhook panel only shows that the URL is reachable. To confirm that deal events are processed, close a test deal and check that its contacts appear as customers in Tirdad.
Changing HubSpot connection settings and credentials
To change the connection name or turn syncs on or off, open Integrations → HubSpot in the Tirdad dashboard and click the pencil icon next to the connection under Connected Accounts. The edit drawer does not show the access token or client secret fields.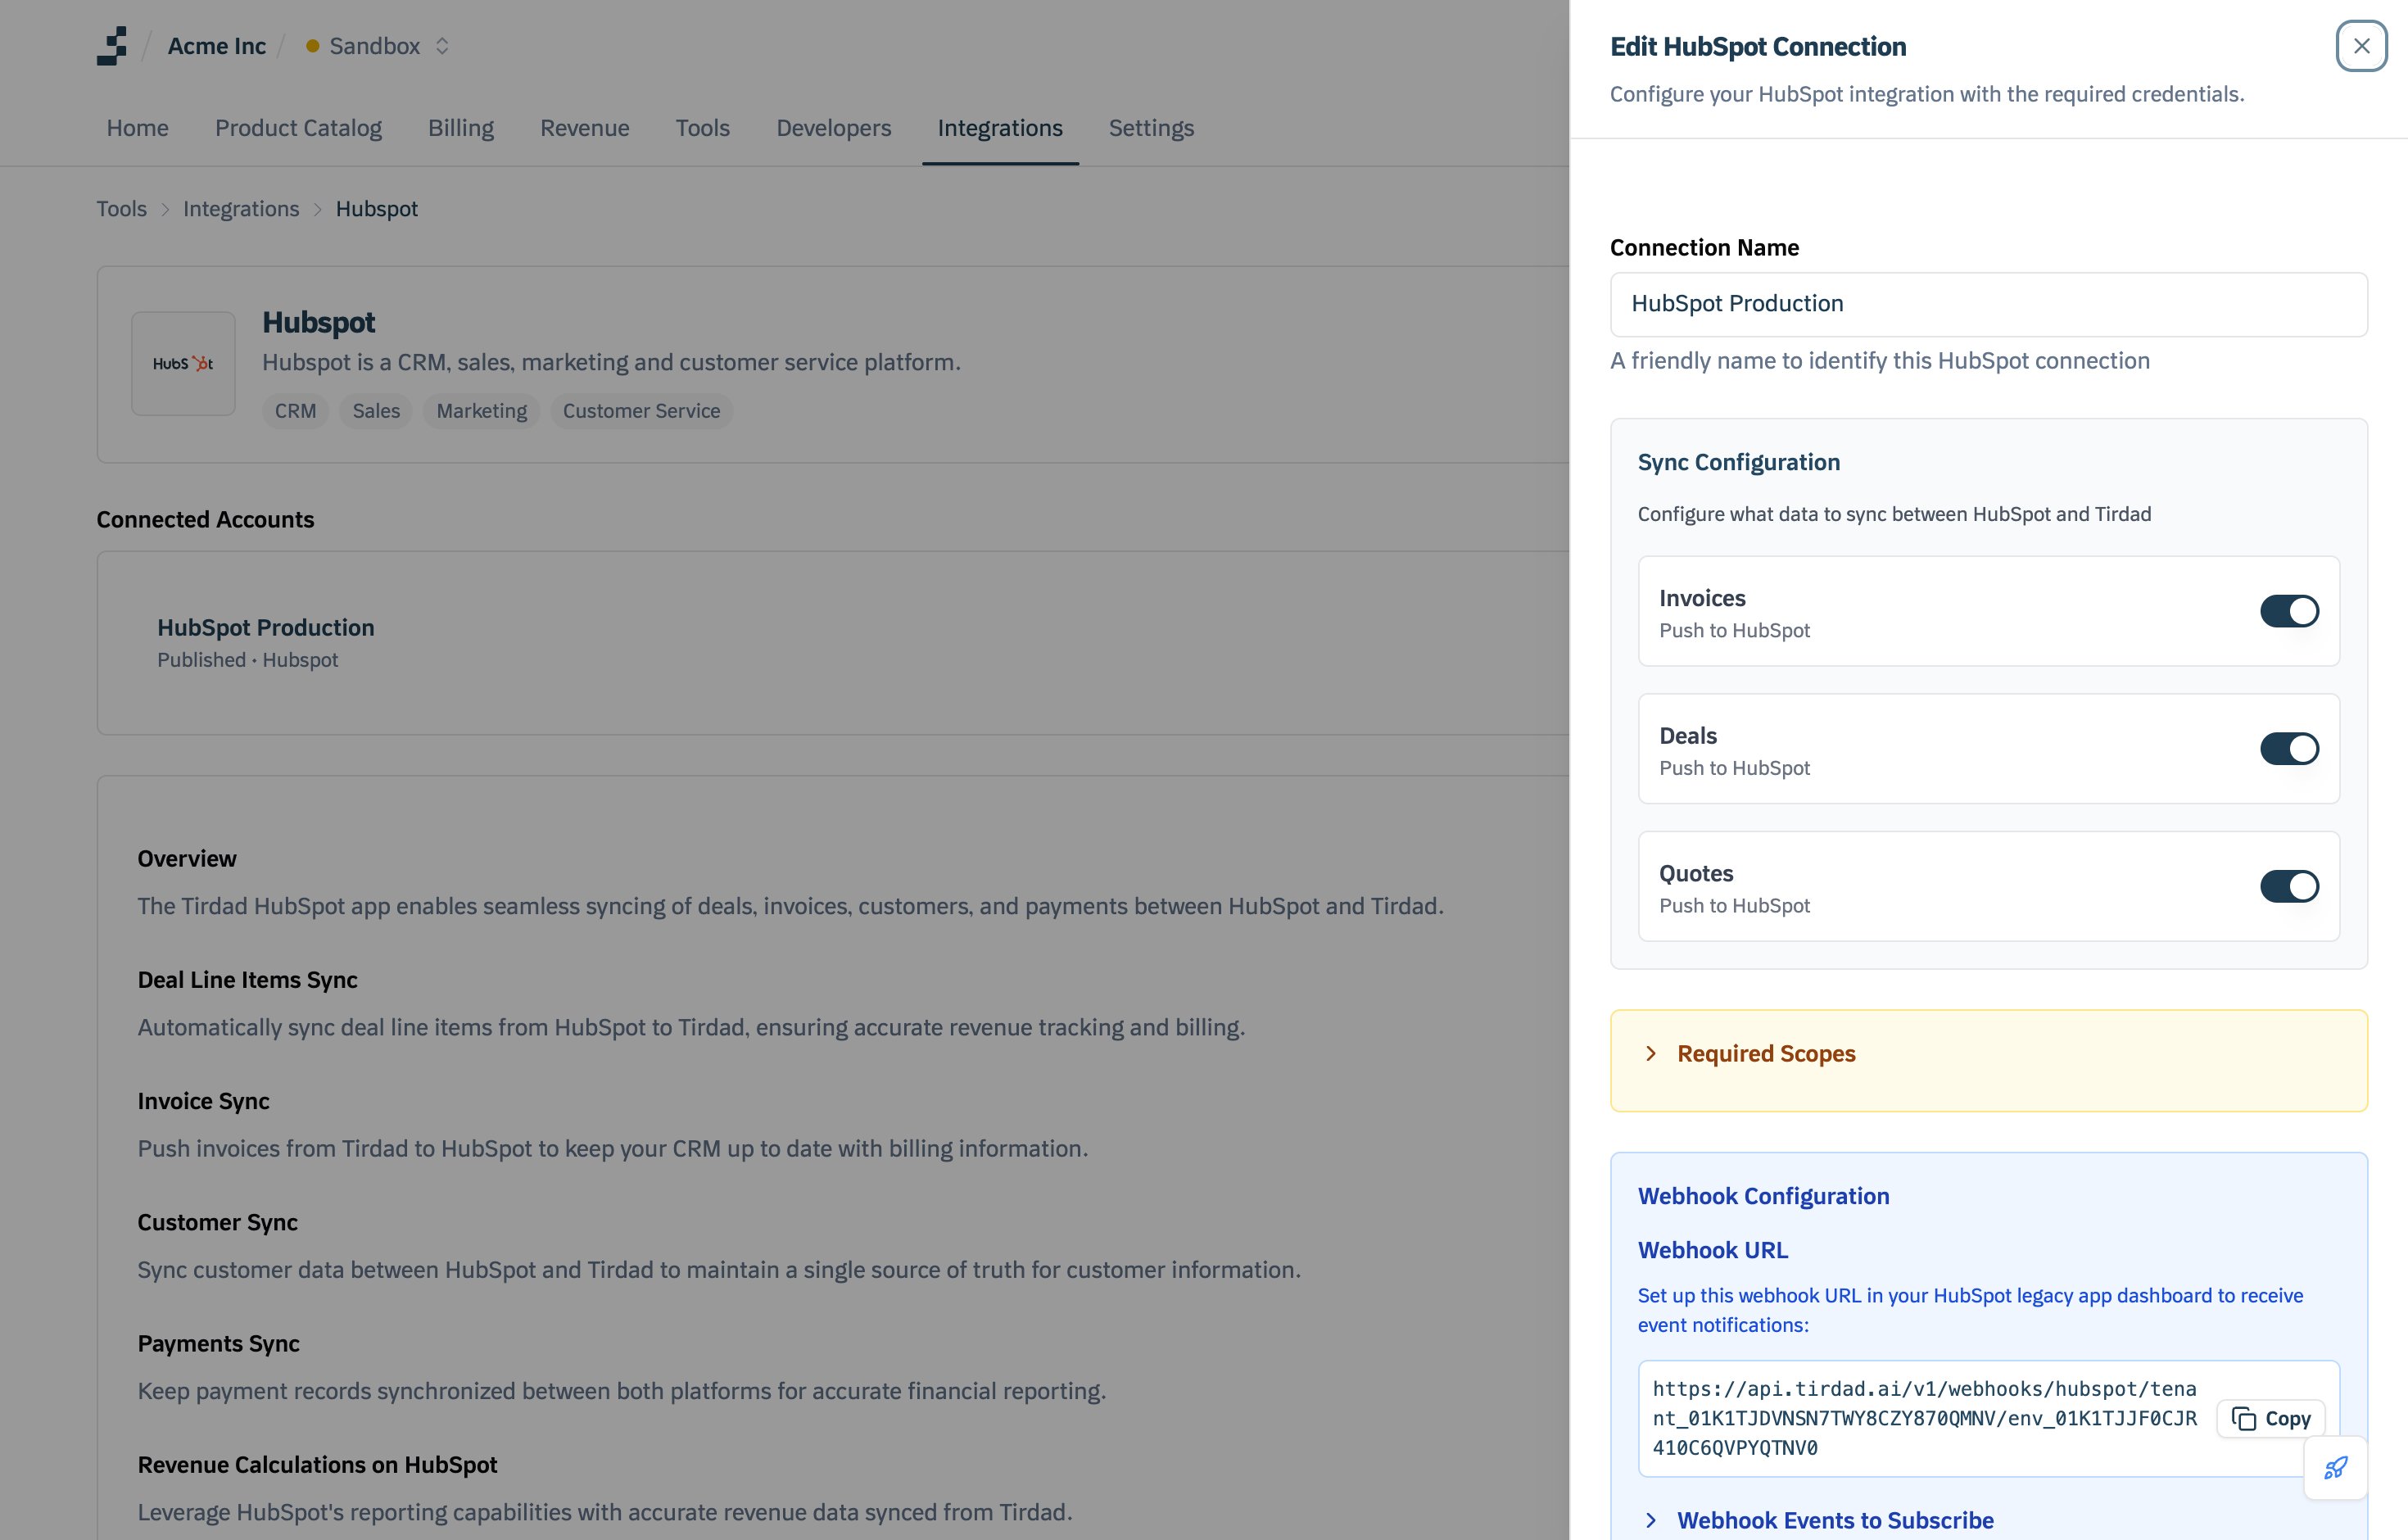
When you rotate the access token in HubSpot, choose Rotate and expire later. The old token keeps working for 7 days, which gives you time to recreate the connection before it expires.
Troubleshooting the HubSpot connection
To see what HubSpot sent and how Tirdad responded, open your app in HubSpot, click the Logs tab, then click Webhooks.
HubSpot sync guides
Customer sync
How contacts on HubSpot deals become Tirdad customers.
Quote sync
How draft subscriptions become draft HubSpot quotes.
Deal sync
How subscription line items and the deal amount reach the HubSpot deal.
Invoice sync
How finalized invoices are pushed to HubSpot.