

Overview
A Chargebee connection in Tirdad stores encrypted credentials that allow the system to interact with your Chargebee account for:- Creating item families, items, and item prices in Chargebee
- Synchronizing customers to Chargebee
- Syncing invoices to Chargebee for payment collection
- Receiving webhook notifications from Chargebee
Prerequisites
Before setting up your Chargebee connection, ensure you have:- Active Chargebee Account - Sign up at chargebee.com
- API Key - Available in your Chargebee Dashboard
- Webhook Endpoint - Configured in Chargebee Dashboard
- Tirdad Environment - Valid tenant and environment IDs
Step 1: Gather Chargebee Credentials
Required Credentials
Finding Your Credentials
-
Site Name:
- Go to Chargebee Dashboard → Settings → API & Webhooks
- Your site name is displayed at the top (e.g.,
acme-test)
-
API Key:
- Go to Chargebee Dashboard → Settings → API & Webhooks → API Keys
- Copy your API key (starts with your site name)
- Use test API keys for development
-
Webhook Credentials (Optional):
- Go to Chargebee Dashboard → Settings → API & Webhooks → Webhooks
- Configure Basic Authentication for webhook security
- Copy the username and password
Step 2: Configure Webhook Endpoint in Chargebee
Webhook URL Format
Required Webhook Events
Configure these events in your Chargebee webhook endpoint:Setting Up the Webhook
- Go to Chargebee Dashboard → Settings → API & Webhooks → Webhooks
- Click + Add New Webhook
- Enter your webhook URL
- Select the required events listed above
- Configure Basic Authentication (optional but recommended)
- Click Save
Step 3: Create Chargebee Connection
Using Tirdad Dashboard
You can create a Chargebee connection directly from the Tirdad dashboard.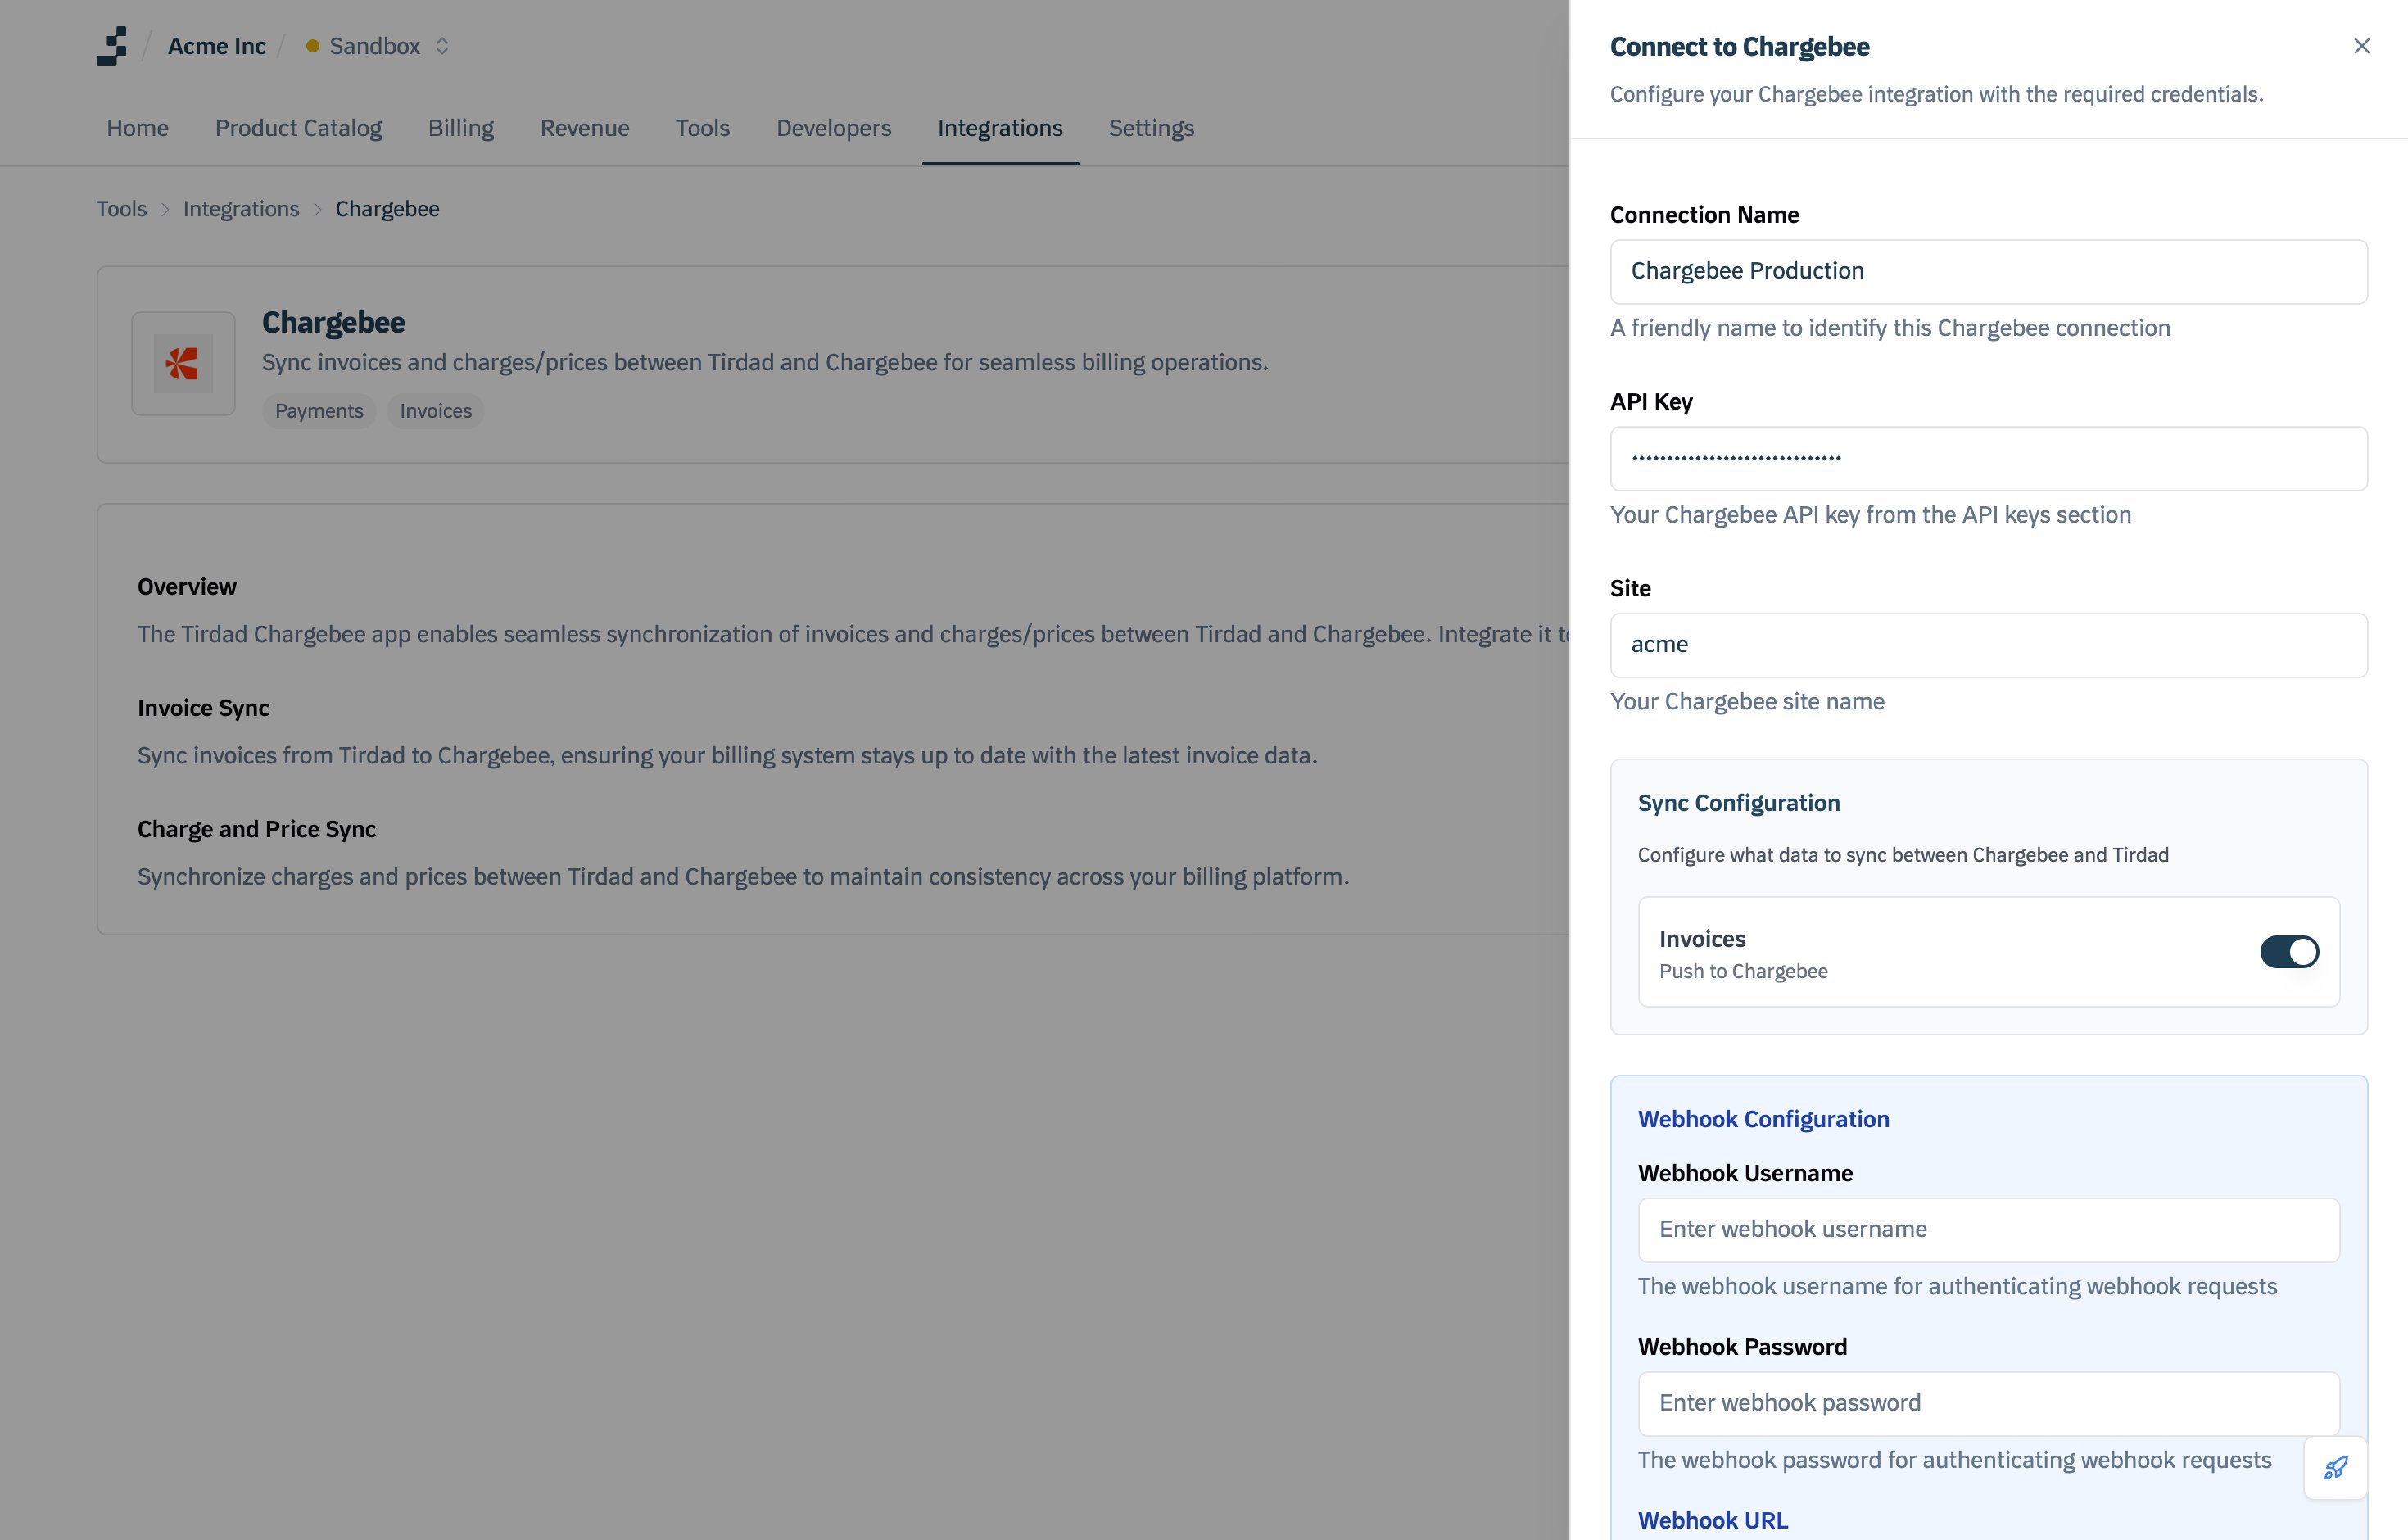
API Request
Endpoint:POST /api/v1/connections
Headers:
Response
Editing an Existing Connection
You can edit an existing Chargebee connection to update its name and sync configuration. To find it, open Integrations → Chargebee and click the pencil icon next to the connection under Connected Accounts.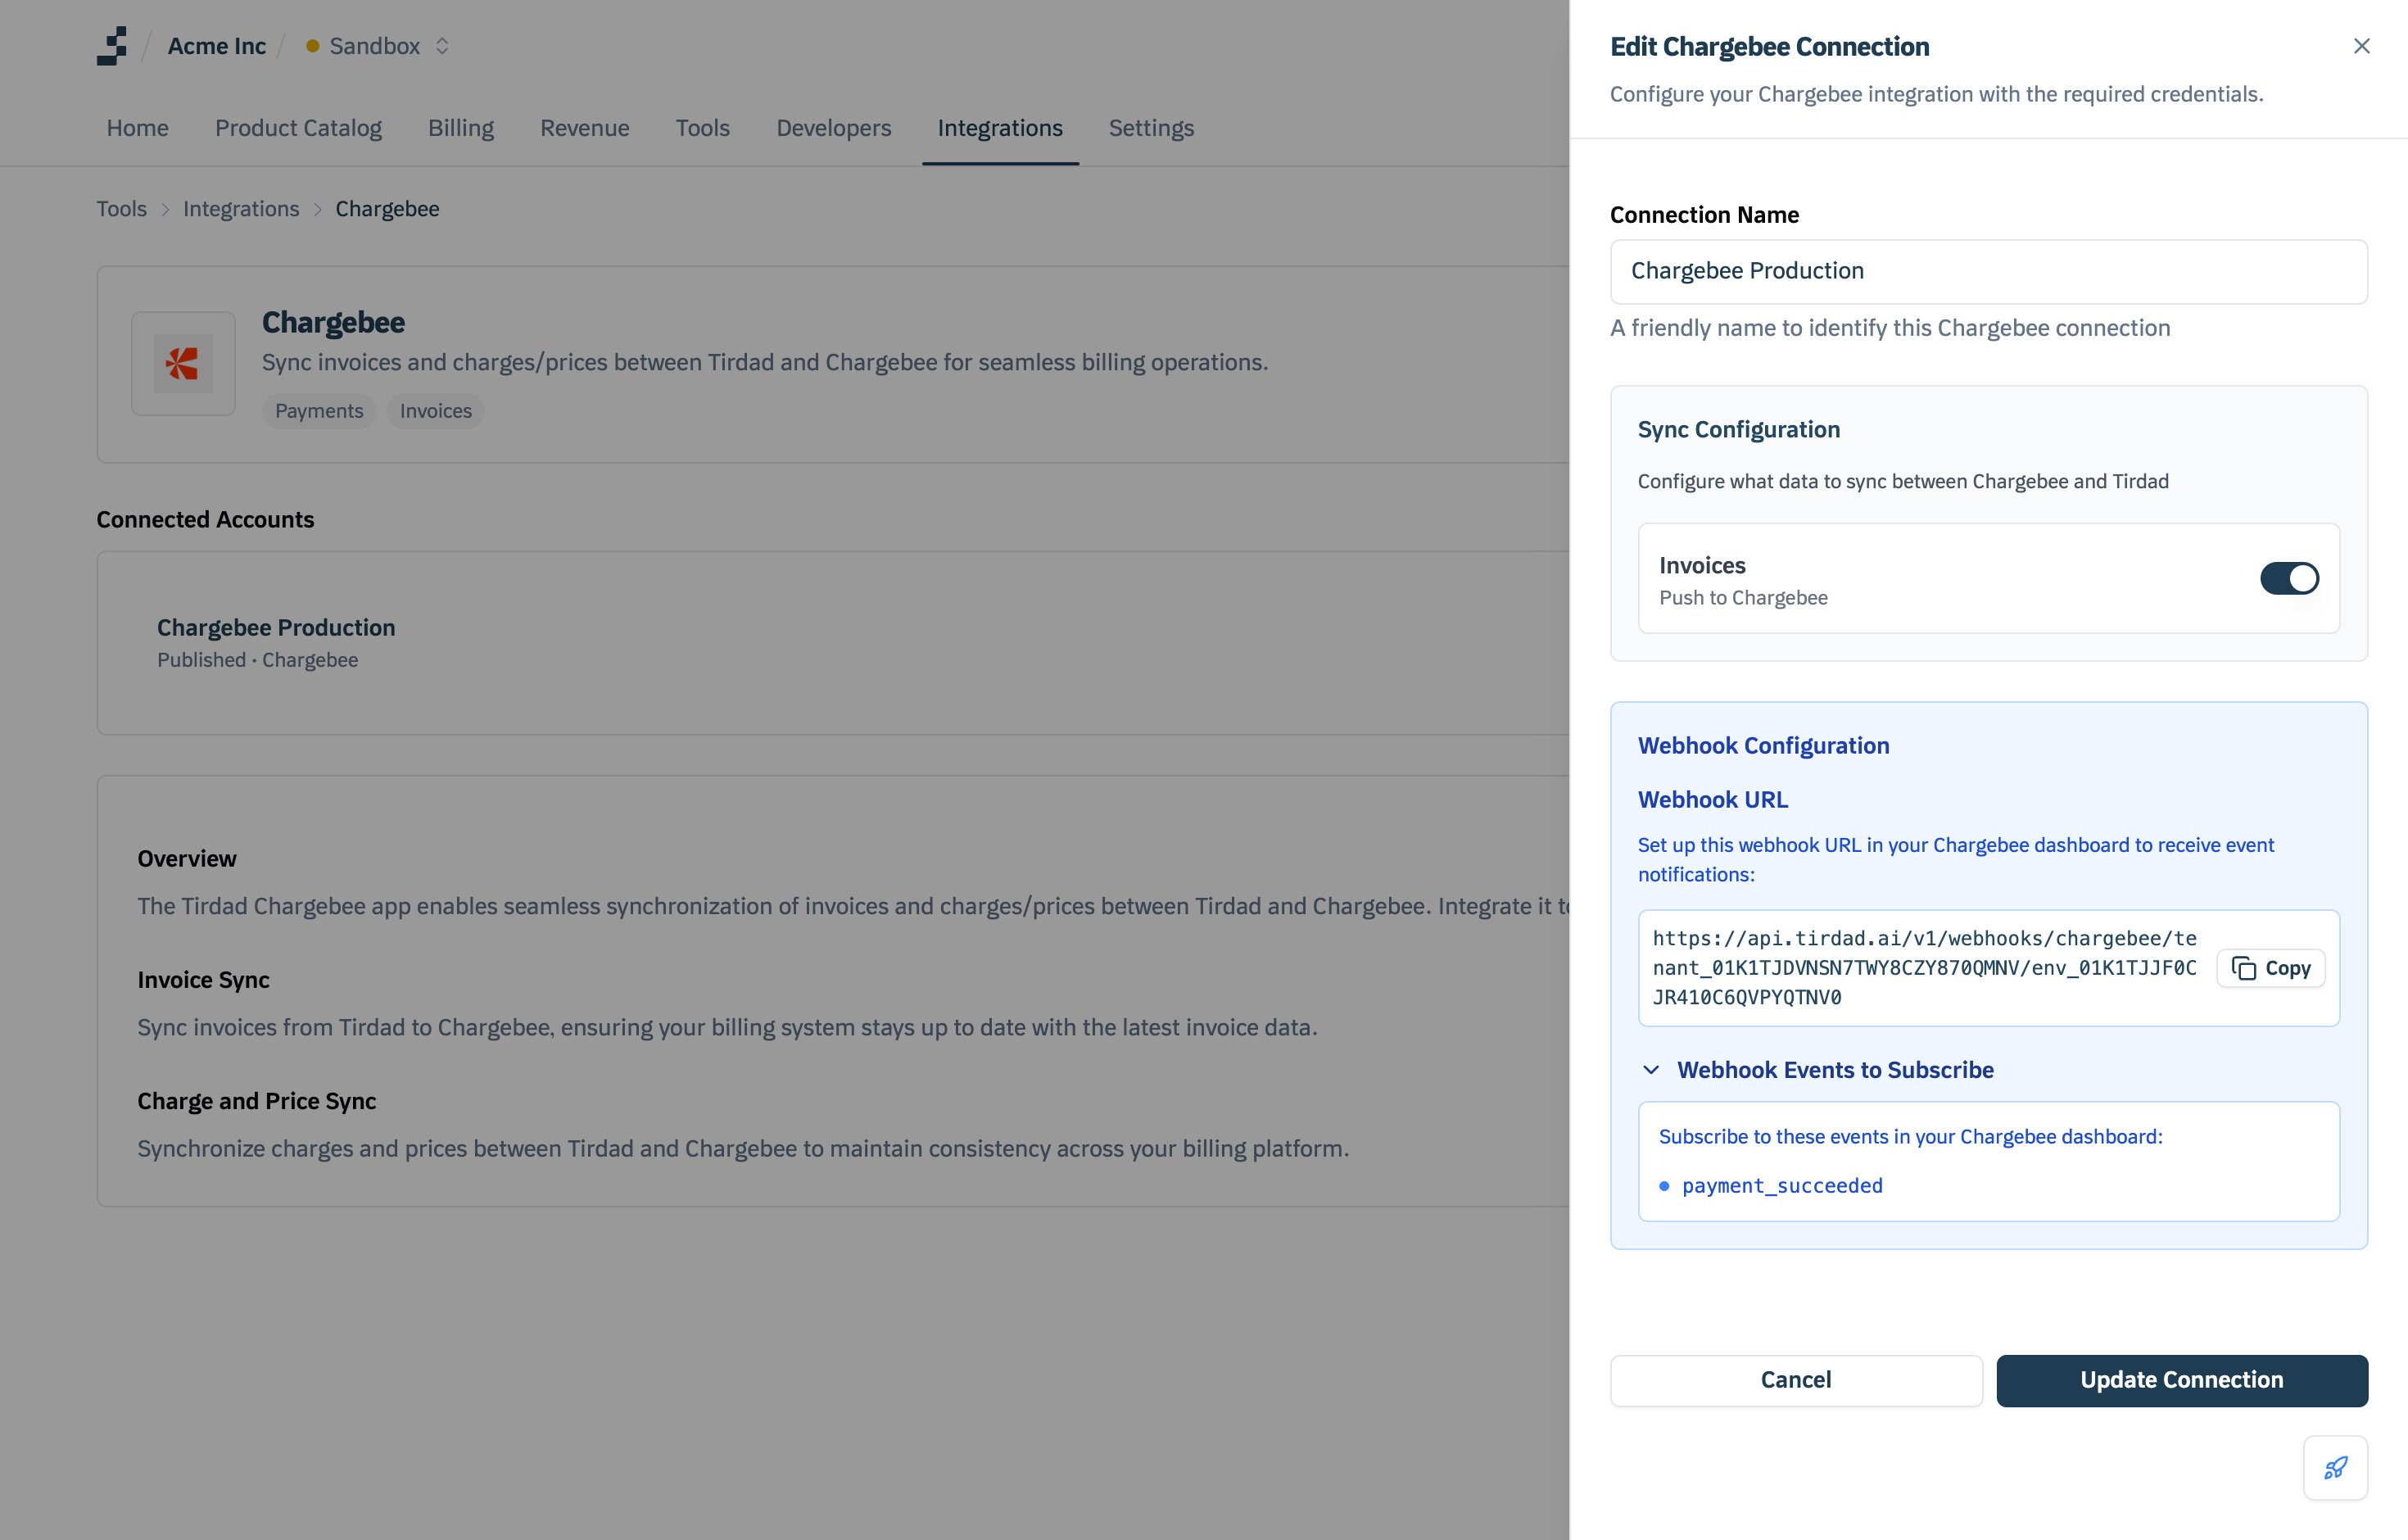
- Connection Name: Update the friendly name for the connection
- Sync Configuration: Enable or disable invoice sync
- Webhook Configuration: Shows the webhook URL and the events to subscribe to
Security Best Practices
Credential Management
- Environment Separation: Use different API keys for test/production
- Key Rotation: Regularly rotate your Chargebee API keys
- Access Control: Limit API key permissions in Chargebee
- Encryption: All credentials are encrypted at rest in Tirdad
Webhook Security
- HTTPS Only: Always use HTTPS for webhook endpoints
- Basic Authentication: Use Basic Auth for webhook verification (recommended)
- Secret Management: Keep webhook credentials secure and rotate regularly
- Rate Limiting: Implement rate limiting on webhook endpoints
Troubleshooting
Common Issues
Debug Steps
- Check Chargebee Dashboard: Verify API key and site name
- Test API Key: Use Chargebee API to test key validity
- Monitor Webhooks: Check webhook delivery logs in Chargebee
- Review Logs: Check Tirdad application logs for errors
Next Steps
After setting up your Chargebee connection:- Create Item Family: Create an item family in Chargebee (required for plan sync)
- Sync Plans: Sync your Tirdad plans to Chargebee
- Test Invoice Sync: Create a test invoice and sync to Chargebee
- Monitor Webhooks: Ensure webhook events are being received
- Go Live: Switch to production credentials when ready